Ivy Smokey Eye
Hey Makeupl0verr's, here's a list with full details on how to get this look :)
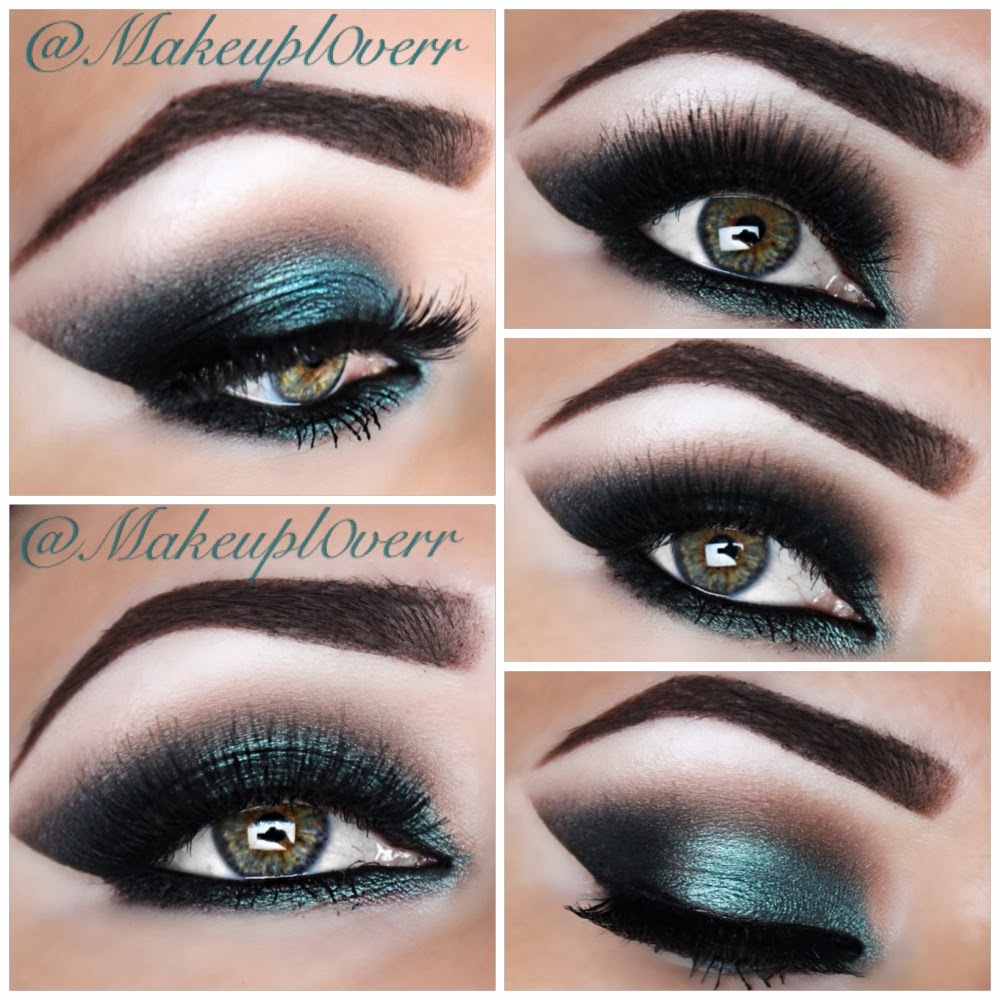


- First I prime my eyelids using Urban Decay's Primer Potion and under my Brows I use Mac Studio Finish Concealer in NC 20. Apply your shadow shields and you are ready to begin! :)
- Using a tapered blending brush, swipe Nectar e/s (Smashbox Master Class Palette 1) all across your crease. Don't forget to go past the shadow shield to make sure you get an even distribution of color all through out. Next, using the same palette & a Mac 217 blending brush, take Sable and apply that all along the crease as well to build depth in your eye.
- Using a Mac 217 blending brush, take Blackout by Samshbox, and apply it to the outer corner of your eye, blending until it is to your liking! Drag the Blackout e/s down under your lower lash line using Mac 219 Pencil brush for an easy application :) This brush is amazing for a smokey eye!!
- From the Master Class Palette, take the e/s cream "Ivy" and apply a thin layer with a flat brush to the first half of your eyelid. Next using Too Faced Summer Eye Palette, I applied Mac Fix Plus to a small flat brush and applied Mermaid e/s to my eyelid. Use that same flat brush with Fix Plus and apply Mermaid e/s to the inner first half of your lower lash line. This e/s on top of the cream e/s will really make the color POP! :)) To make sure your look is blended well, take a clean blending brush and lightly blend the Mermaid e/s into the Sable e/s.
- Line your eyes with Inglot Gel eyeliner #77. I like to apply this on the waterline as well because pencil liners just don't work as well on me.
- Choose your favorite dramatic lashes and you are set! Here I chose Red Cherry Lashes #117 & #747L. Sit the #117 on top of the #747L and apply your Duo glue :)
- Once you remove your Shadow Shields, use your concealer under your eyes and along the outer edge of your e/s. This always makes your makeup look crisp and clean!
No comments:
Post a Comment